Friday, June 21, 2019
In the third part of our four-part WHS mobile device development series, we’re going to investigate another task that we get asked about time and time again, while developing warehouse mobile devices – how to add a new list window. The benefits of displaying a list of possible input values instead of manually entering data are tremendous so let’s get right down to it!
Dynamics 365 enables you to display a list of basically anything: purchase orders, purchase order lines, work or loads. Here’s an example list of purchase order lines used in an organization’s PO receiving process:
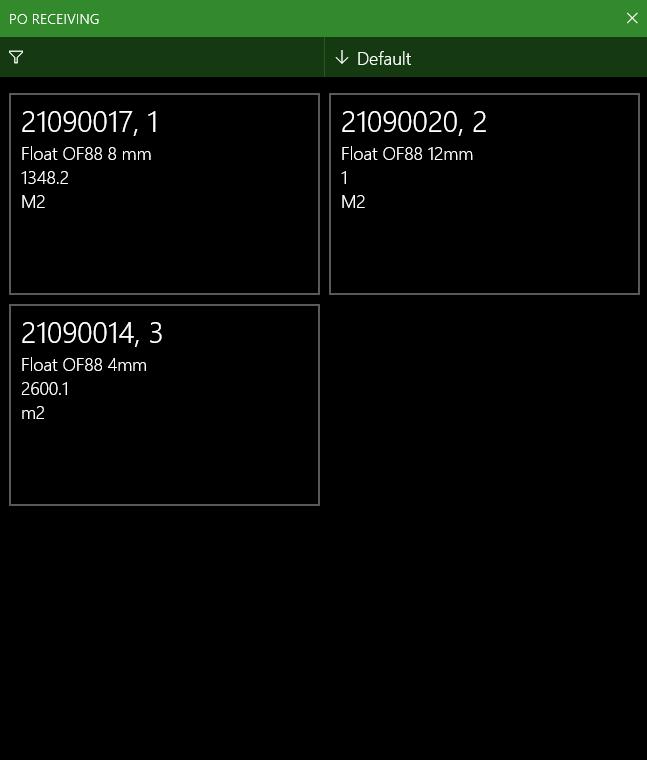
Screenshot 1: List of purchase order lines with related information
Creating a Field List
The first thing that needs to be created is a field list, which is used to identify the information to be shown in the list button. If the primary field for the list button is ‘WorkId’, then you can reuse the standard field list functionality. Otherwise, you will have to duplicate it and incorporate the necessary changes to suit your implementation.
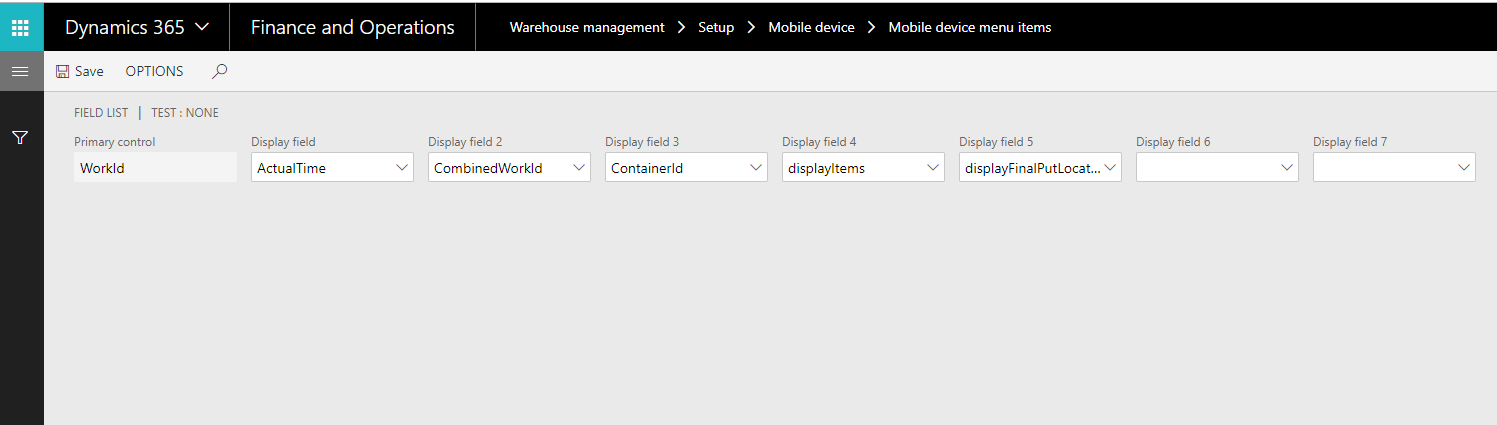
Screenshot 2: Standard field list form
There may be times when you need to add additional display methods to appear in the list button which don’t originally exist in standard functionality. In such cases, you would need to create a display method on your main list table and add it by extending the WHSTmpFieldName.populateWorkDisplayMethods() method like this:
class TstWHSTmpFieldNameLoadDropdownInstructionsEH
{
/// <summary>
///
/// </summary>
/// <param name="args"></param>
[PostHandlerFor(tableStr(WHSTmpFieldName), tableMethodStr(WHSTmpFieldName, populateWorkDisplayMethods))]
public static void WHSTmpFieldName_Post_populateWorkDisplayMethods(XppPrePostArgs _args)
{
WHSTmpFieldName fieldName = _args.getThis() as WHSTmpFieldName;
ttsbegin;
fieldName.SysTableId = 0;
fieldName.SysFieldID = 0;
fieldName.FieldName = tableMethodStr(WHSLoadTable, tstDisplayInfo);
fieldName.insert();
ttscommit;
}
}
Adding a List Step to a WHS Mobile Device
Let’s assume that you’ve created a separate WHS mobile device process by extending WHSWorkExecuteDisplay class and one of the requirements is to add a list window step. The main source of knowledge to use is the standard classes that implement this feature (e.g. WHSWorkExecuteDisplayListWork class). You can find all of the necessary code that can be reused in the WHSWorkExecuteDisplayListWork.getListWorkStep() method. Within this method, you will find the buildHeader() method which defines which fields will be shown in the list button by iterating the field list that we mentioned above. The buildTableContents() fills the display container with the actual list data that will be shown. This is where you can build a query to represent the list you’re trying to display. Finally, the buildPagingControls() method will add the necessary button controls to the display container.
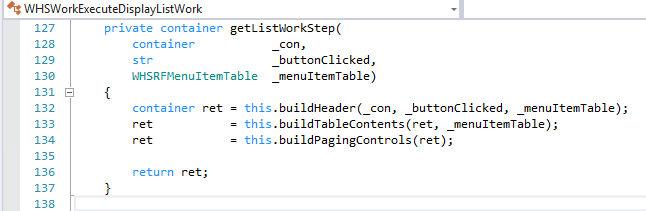
Screenshot 3: An example of list implementation in standard WHSWorkExecuteDisplayListWork class
By using this code alone, you will not achieve the desired result. To achieve the desired result, you would also need to set the mobile device display page pattern to InquiryWithNavigation. This can be done by creating a new class that implements the WHSIMobileAppServiceXMLDecoratorFactory class which looks something like this:
[WHSWorkExecuteMode(WHSWorkExecuteMode::TstWorkList)]
public class TstWHSMobileAppServiceXMLDecoratorFactoryLoadDropdown implements WHSIMobileAppServiceXMLDecoratorFactory
{
#WHSRF
public WHSMobileAppServiceXMLDecorator getDecorator(container _con)
{
// Insert your check here
if (this.isWorkListStep(_con))
{
return new WHSMobileAppServiceXMLDecoratorWorkList();
}
return new WHSMobileAppServiceXMLDecoratorFactoryDefault().getDecorator(_con);
}
private boolean isWorkListStep(container _con)
{
#WHSRF
const int LOADLISTSTEP = 0;
container con = _con;
WHSRFPassthrough pass = WHSRFPassthrough::create(conPeek(con, #PassthroughInfo));
int currStep = conPeek(conPeek(con, #StateInfo), #StateInfoStep);
return currStep == LOADLISTSTEP && !pass.exists(TestWHSWorkExecuteDisplayLoadDropdown::LOADIDC);
}
}
If the validation succeeds, the WHSMobileAppServiceXMLDecoratorWorkList object gets created which sets the mobile device display page pattern and defines the rules for the mobile device page. This will only work when your primary field is WorkId. If your implementation uses a different field, you should duplicate the standard functionality and refactor it to suit your needs.
Note: At first your decorator extension might not be recognized by the framework. If that‘s the case try running this line of code using a job:
SysExtensionCache::clearAllScopes();
We hope that you have a better understanding of adding a new list window and that you found part three of our four-part blog series useful! Check out part one of the series to learn how to replace or insert field values and explore part two to see how to skip a standard step. Contact the team by emailing services@1ClickFactory.com if you have any questions!
Stay tuned for the last part of the series, part four, for a round-up of useful tips for Microsoft Dynamics 365 Finance & Supply Chain Management WHS mobile device development.