Monday, March 23, 2020
As a leading Microsoft Dynamics Cloud Software Factory, and one of the largest providers of Dynamics NAV/Dynamics 365 Business Central on Azure services globally, we often receive questions from Microsoft Partners about the configuration of Extension Development Environments.
Therefore, we’ve created a two-part blog series to share our best practices and to address the issues that Partners most commonly come across. In part one, we’ll be reviewing how to set up an Extension Development Environment using Visual Studio Code.
Pre-requisites
- Visual Studio Code with “AL language” Extension installed on your local computer.
- Microsoft Dynamics 365 Business Central development license.
- Dynamics NAV/Dynamics 365 Business Central installation. In our example, we will be using the Dynamics 365 Business Central version 15 installation.
Create a new Dynamics NAV/Dynamics 365 Business Central server instance
To create a new Dynamics NAV/Dynamics 365 Business Central instance you will need to know your service user credentials. If you are using 1ClickFactory Self-Provisioning platform, simply go to the 1ClickFactory Self-Provisioning portal. In the portal, go to “Customer Installations”, then select the installation. Next, click on the gear icon and select “Change Service User Password”. In the opened window you will see the service username and will be able to change service user password.
Next, connect to the machine where Dynamics NAV/Dynamics 365 Business Central server is running to add a new Dynamics NAV/Dynamics 365 Business Central instance. You can do this by running the PowerShell script that is added at the end of this blog post or by setting up the new instance manually. If you chose to create the new instance manually, open “Business Central Administration” and add a new Dynamics NAV/Dynamics 365 Business Central instance, then in the “Server Instance Settings” tab, enter instance name and new service ports. In the “Service Account” tab, select “User Account” for the “Account” field and enter the credentials of the service user. Click OK.
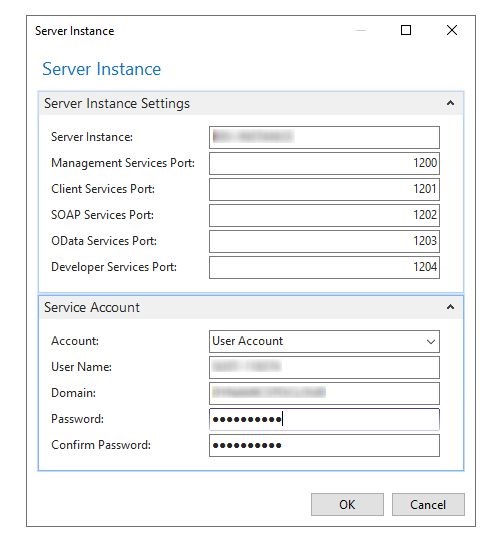
Image 1: Virtual Machine – Business Central Administration – New Server Instance
Now let’s enter the missing settings for the new instance. You can copy most of the settings like “Certificate Thumbprint”, “Web Client Base URL”, “Database Name” and “Database Server” from the existing server instance. Then set “Credential Type” to “NavUserPassword”.
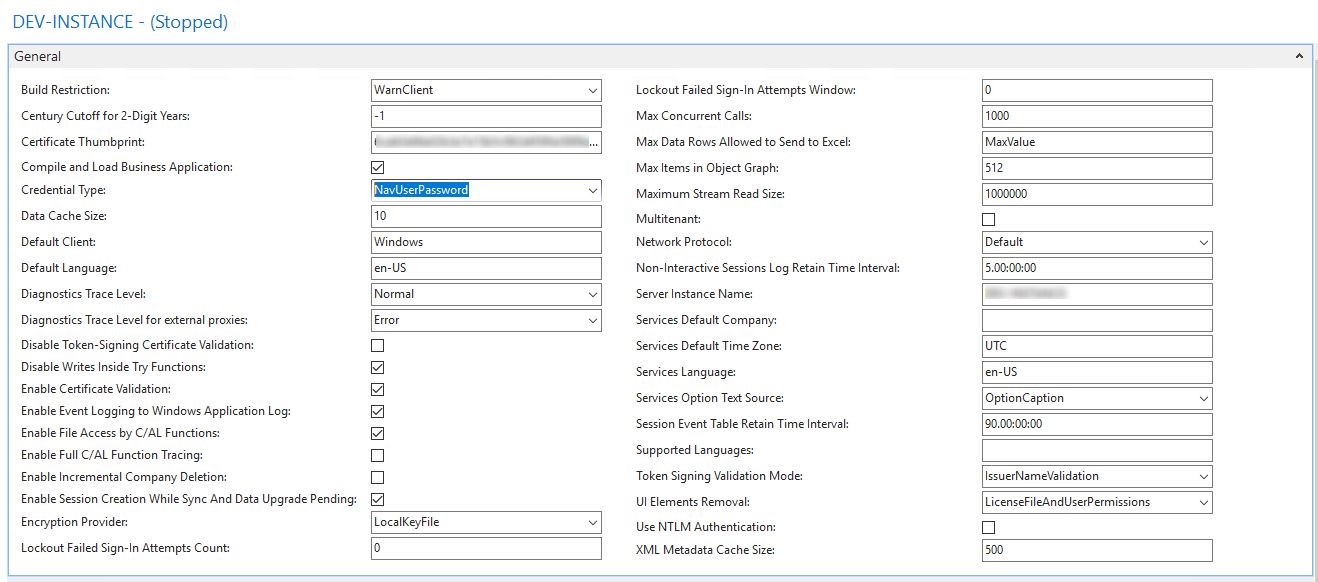
Image 2: Business Central Administration – DEV Instance Settings
In the Development tab, tick “Enable Debugging”, “Enable Loading Application Symbol References at Server Startup” and “Enable SSL” boxes. Save the settings. At this point, you can now start the new server instance.

Image 3: Business Central Administration - DEV Instance Settings – Development Tab
If you are using 1ClickFactory Self-Provisioning platform you might need to open a new endpoint in the 1ClickFactory Self-Provisioning platform for the new “Developer Service Port”. To do this, navigate to “Application Servers”, then on the selected application server click on the gear icon and select “Show Endpoints”. Click on the green “Create” button and enter the information about the endpoint. Click “Create”.
Set up the environment for developer users
For a developer to be able to start developing an Extension, first, we have to set the “Business Central Password Authentication” for this user in the Dynamics NAV/Dynamics 365 Business Central client. Open either the Web client or Windows client (if you are using a version prior to Dynamics 365 Business Central version 15) of the original instance and navigate to the “Users” list. Open the “User Card” and enter the password in the “Business Central Password Authentication” tab. Then, disable the “User Must Change Password at Next Login” option.
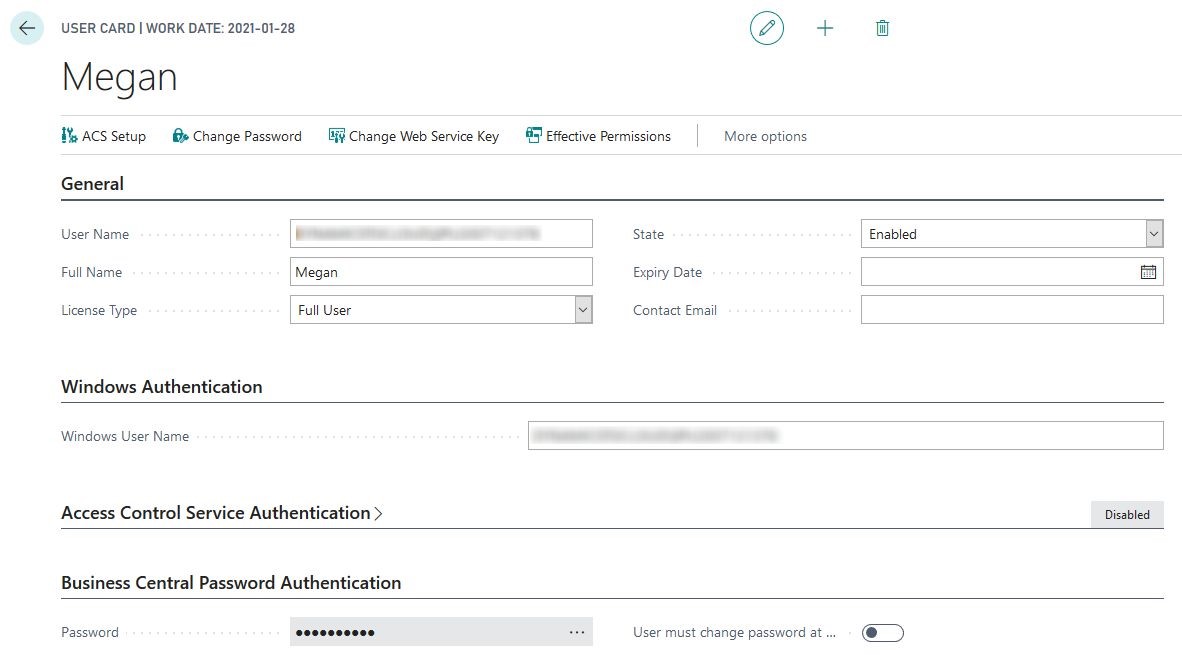
Image 4: Dynamics 365 Business Central Client – User Card
Now, open the Visual Studio Code (make sure you have an “AL Language” Extension installed). Then navigate to View -> Command Palette or simply press Ctrl+Shift+P. In the Command Palette, type “AL: Go!” command, then enter the project name and press “Enter”. Select target platform, in our case, “4.0 Business Central 2019 release wave 2”. For the server parameter, choose “Your Own Server”.
After that, we need to edit the “launch.json” file. If you are using 1ClickFactory Self-Provisioning platform, for the server parameter, just copy your WEB client‘s address, without the port number, then add the “port” parameter with the development service port and change the “serverInstance” parameter to your development instance‘s name. After making these changes, the configuration should look similar to what is below.
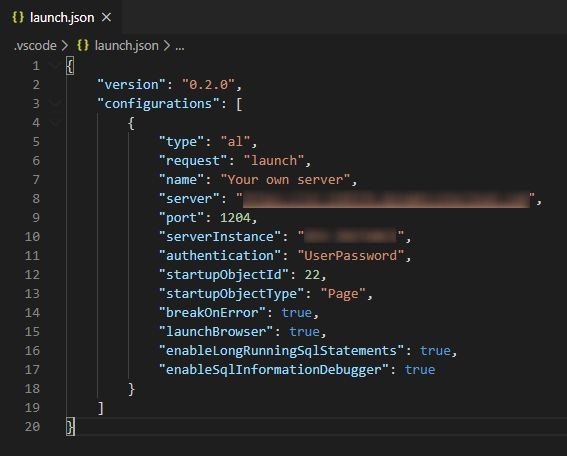
Image 5: Visual Studio Code – “launch.json” Settings
Next, we need to download the symbols. Open the “Command Palette” once more and type in the command “AL: Download symbols”. You will need to authenticate yourself. For “Your Username”, copy the value from the “Username” field in the User’s Card in Dynamics NAV/Dynamics 365 Business Central client, and for the password use the Dynamics 365 Business Central Password we set up earlier. If the symbols are downloaded, you will see this message in the output console:

Image 6: Visual Studio Code – Output Console - Symbols Successfully Downloaded
Publish an Extension
Let’s try to publish an Extension. There should be a file, called “HelloWorld.al” in your project. This is a sample Extension, that will show a message for the user when they open the “Customers” list.
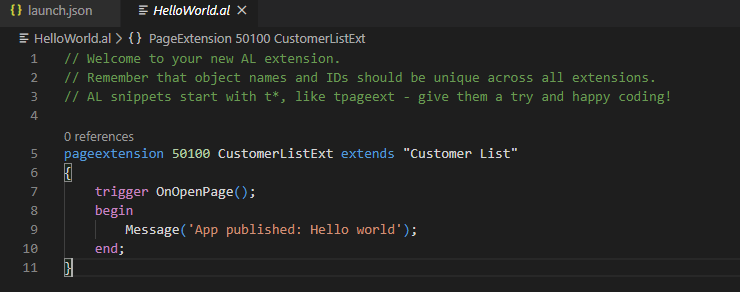
Image 7: Visual Studio Code – “HelloWorld.al”
To publish this Extension, navigate to “Debug -> Run Without Debugging” or simply press Ctrl+F5. If you haven’t provided a “Web Client Base URL” in the settings of the new instance, you will get an error message in the debug console. It’s okay, the Extension has still been published.

Image 8: Visual Studio Code – Debug Console
Try to open the “Customers” list in the Dynamics NAV/Dynamics 365 Business Central client. You should get a message like this:
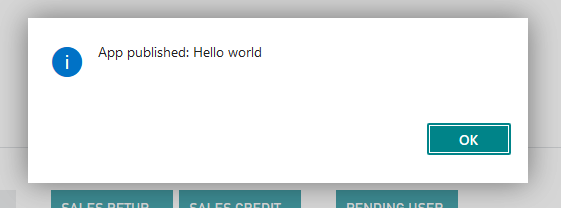
Image 9: Dynamics 365 Business Central Client – App published
Congratulations! You have just published your first Extension.
In part two, we will review how to prepare for the debugging process in Visual Studio Code. Stay tuned!
About 1ClickFactory Self-Provisioning for Dynamics NAV/Dynamics 365 Business Central on Azure
With 1ClickFactory’s Self-Provisioning for Dynamics NAV/Dynamics 365 Business Central on Azure service, Microsoft Dynamics Partners can easily deploy Dynamics NAV/Dynamics 365 Business Central solutions on Microsoft Azure through our platform in 1 hour or less. It’s self-service and available 24/7 on a highly secure and readily supported environment.
Find out more about the 1ClickFactory Self-Provisioning for Dynamics NAV/Dynamics 365 Business Central on Azure service or contact us at service@1clickfactory.com.
Appendix: PowerShell script to create new DEV instance
# These are parameters the user needs to provide
$BCVersion = Read-Host -Prompt "Business Central Version (130, 140, 150, etc.)"
$FromInstanceName = Read-Host -Prompt "Copy from instance name"
$ToInstanceName = "$FromInstanceName-DEV"
$ServiceAccountCredential=Get-Credential -Message "Supply values for the following parameters:" -UserName "DYNAMICSTOCLOUD\"
# The script itself
Import-Module "$env:ProgramFiles\Microsoft Dynamics 365 Business Central\$BCVersion\Service\NavAdminTool.ps1" -WarningAction SilentlyContinue | Out-Null
$DatabaseServer = Get-NAVServerConfiguration -ServerInstance $FromInstanceName -KeyName "DatabaseServer"
$DatabaseName = Get-NAVServerConfiguration -ServerInstance $FromInstanceName -KeyName "DatabaseName"
$CertificateThumbrint = Get-NAVServerConfiguration -ServerInstance $FromInstanceName -KeyName "ServicesCertificateThumbprint"
WebClientBaseURL = Get-NAVServerConfiguration -ServerInstance $FromInstanceName -KeyName "PublicWebBaseUrl"
[int]$ManagementServicesPort = Get-NAVServerConfiguration -ServerInstance $FromInstanceName -KeyName "ManagementServicesPort"
[int]$ClientServicesPort = Get-NAVServerConfiguration -ServerInstance $FromInstanceName -KeyName "ClientServicesPort"
[int]$SOAPServicesPort = Get-NAVServerConfiguration -ServerInstance $FromInstanceName -KeyName "SOAPServicesPort"
[int]$ODataServicesPort = Get-NAVServerConfiguration -ServerInstance $FromInstanceName -KeyName "ODataServicesPort"
[int]$DeveloperServicesPort = Get-NAVServerConfiguration -ServerInstance $FromInstanceName -KeyName "DeveloperServicesPort"
$ManagementServicesPort += 1000
$ClientServicesPort += 1000
$SOAPServicesPort += 1000
$ODataServicesPort += 1000
$DeveloperServicesPort += 1000
New-NAVServerInstance $ToInstanceName -ServiceAccount User -ServiceAccountCredential $ServiceAccountCredential `
-ManagementServicesPort $ManagementServicesPort -ClientServicesPort $ClientServicesPort `
-SOAPServicesPort $SOAPServicesPort -ODataServicesPort $ODataServicesPort `
-DeveloperServicesPort $DeveloperServicesPort -DatabaseServer $DatabaseServer -DatabaseName $DatabaseName `
-ClientServicesCredentialType NavUserPassword -ServicesCertificateThumbprint $CertificateThumbrint `
-WarningAction SilentlyContinue | Out-Null
Set-NAVServerConfiguration -ServerInstance $ToInstanceName -KeyName "PublicWebBaseUrl" `
-KeyValue $WebClientBaseURL -WarningAction SilentlyContinue | Out-Null
Set-NAVServerConfiguration -ServerInstance $ToInstanceName -KeyName "EnableSymbolLoadingAtServerStartup" `
-KeyValue true -WarningAction SilentlyContinue | Out-Null
Set-NAVServerConfiguration -ServerInstance $ToInstanceName -KeyName "EnableDebugging" `
-KeyValue true -WarningAction SilentlyContinue | Out-Null
Set-NAVServerConfiguration -ServerInstance $ToInstanceName -KeyName "DeveloperServicesSSLEnabled" `
-KeyValue true -WarningAction SilentlyContinue | Out-Null
Start-NAVServerInstance -ServerInstance $ToInstanceName