Thursday, June 6, 2019
Welcome to part two of our four-part series on Dynamics 365 Finance & Supply Chain Management WHS mobile device development. This informative blog series was designed to impart knowledge and shed light on the best practices required for achieving Dynamics 365 Finance & Supply Chain Management WHS mobile device developments. Without further ado let’s dive straight into part two of the series.
In the second part of our WHS mobile device development series, we’re going to learn how to skip a standard step in the warehouse mobile device process. This task is a little more challenging because it requires quite some trial and error to achieve a working solution. Basically, what we need to do is call the displayForm method after the standard displayForm method. This will move the process to the next window in the mobile device. It should be noted that before running displayForm for the second time, the necessary inputs must be set (these would be set by the user). To achieve this successfully, the display container and passthrough object may need to be modified for this purpose.
Let’s take a standard inventory adjustment process as an example and skip its first window which requires a location or license plate value.
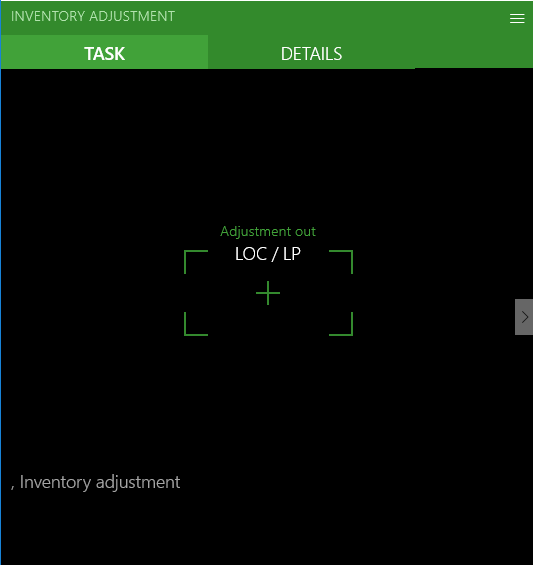
Screenshot 1: A window that will be skipped
In this scenario, we need to extend WhsWorkExecuteDisplayAdjustOut class and after the displayForm method is run, execute our modification. We will set a dummy value for Loc / LP field by inserting it in a display container and set the adjustment type value for the functionality to look like a standard window. We will also need to specify that the OK button was pressed by passing a #RFOK macro to displayForm method.
Here’s an example of how it looks in x++:
[ExtensionOf(classStr(WhsWorkExecuteDisplayAdjustOut))]
final class CF1_WHSWorkExecuteDisplayAdjustOut_Extension
{
container displayForm(container _con, str _buttonClicked)
{
#WHSRF
// Determine if it's the right place to skip the step
boolean canSkip = this.testCanSkip(pass, _con, step);
container returnedCon = next displayForm(_con, _buttonClicked);
// Check if we have a Loc / LP field
if (canSkip && this.indexOfBuildControlFromContainer(returnedCon, #LocOrLP) > 0
&& !this.getControlDataFromContainer(returnedCon, #LocOrLP))
{
// Set location value
returnedCon = this.setControlDataFromContainer(returnedCon, #LocOrLP, 'B1');
// Set adjustment type value from the passthrough object
if (pass.hasValue(#SelectedAdjustmentType) && this.indexOfBuildControlFromContainer(returnedCon, #AdjustmentType) > 0)
{
returnedCon = this.setControlDataFromContainer(returnedCon, #AdjustmentType, pass.lookup(#SelectedAdjustmentType));
}
// Specify that Ok button was pressed
returnedCon = this.displayForm(returnedCon, #RFOK);
}
return returnedCon;
}
// Implement your check logic here
public boolean testCanSkip(WHSRFPassthrough _pass, container _con, int _step)
{
boolean skipLP;
boolean isFromWorkList;
if (_pass && _pass.hasValue(#MenuItem))
{
const int IDELEMENT = 4;
const int SKIPSTEP = 1;
WHSRFMenuItemTable menuItemTable = WHSRFMenuItemTable::find(_pass.lookup(#MenuItem));
WHSLicensePlateId id;
boolean hasError;
hasError = this.hasError(_con);
if (conLen(_con) >= IDELEMENT)
{
id = conPeek(conPeek(_con, hasError ? IDELEMENT + 1 : IDELEMENT), #data);
skipLP = !_pass.exists(#NoValidation) && _step == #NoLocation && _pass.exists(#WMSLocationId)
&& _pass.lookup(#WMSLocationId) == '' && _pass.exists(#AutoConfirm) && _pass.exists(#IsLicensePlateControlled)
&& _pass.lookup(#IsLicensePlateControlled) == '0' && id;
if (!skipLP && _step == SKIPSTEP && id && !_pass.hasValue(#LicensePlateId))
{
WHSWorkTable workTableLocal;
//Id can be WorkId or LicensePlateId
workTableLocal = WHSWorkTable::find(id);
if (!workTableLocal)
{
workTableLocal = WHSWorkTable::findByLicensePlate(id, menuItemTable.HandleByLP);
}
skipLP = workTableLocal.RecId;
}
}
}
return skipLP;
}
}
The above example is quite a trivial case. In your case, you might encounter more difficult scenarios where a lot of debugging is required to figure out which fields need to be set in the display container or the passthrough object. Keep in mind that your main goal is to ensure that the generated display container and the XML that will be sent to the mobile device are identical to that of the standard solution.
We hope that you’ve found part two of our four-part series beneficial. In case you missed it, part one of the series looks at how to replace or insert field values. If you’d like to learn more or have any questions, please contact us at services@1ClickFactory.com and we’d be happy to help.
Stay tuned for part three of the series for details on how to add a new list window in Dynamics 365 Finance & Supply Chain Management WHS mobile device development.