Wednesday, April 10, 2019
Have you considered integrating Office 365 with Business Central? This can increase efficiency while using Office 365 tools and would allow you to access the data easily and quickly. The script provided in the blog post (first of two blog posts) will help you configure and enable Office 365 authentication with Business Central.
This integration provides a single sign-on (SSO) property, which enables users to access both the Microsoft Dynamics 365 and Office 365 organizations with a single user name and password. It provides users with a familiar sign-on experience. In addition to this, it also enables the usage of Edit in Excel, Outlook sync and other functionalities.
Requirements for the deployment before running the script:
- Partner needs to have Azure Active Directory or Office 365
- The script must run on the Business Central Server installation (not Client installation)
- SSL certificate must be used for Business Central installation
- Business Central Web Client should be already running
- Make sure that all of the users who have an access today contain Azure AD user names as email address in Business Central user card
After integrating Office 365 with Business Central, we'll publish the second part of the blog dedicated to a useful ‘Edit in Excel’ functionality, which you will be able to set up once you've read it.
Firstly, we need to import libraries for Azure AD and Business Central
#if AzureAD powershell is missing, it will install required package
Install-Module -Name AzureAD -FORCE
#importing BC powershell modules so required commandlets could work
Import-Module "C:\Program Files\Microsoft Dynamics 365 Business Central\130\Service\Microsoft.Dynamics.Nav.Management.dll"
Import-Module "C:\Program Files\Microsoft Dynamics 365 Business Central\130\Service\NAVWebClientManagement.psm1"
Now, we already have libraries uploaded and we can start using them. We will connect to Azure AD and create an Azure app.
#Provide Global Admin credentials of the Office 365 tenant
$Credential = Get-Credential
#lets connect to the AzureAD
Connect-AzureAD -Credential $Credential
#Setting up parameters
$BCServerInstance = '<instanceName>' #BC instance name
$domainName = '<DomainName>' #Public domain name of the server running BC instance, for example:server.domain.com
$fullAddress = $BCServerInstance +'.' + $domainName #combine BC instance name and Domain name for reply address
$Office365TenantName = "<Office365TenantName>" #Office 365 tenant name, for example: company.onmicrosoft.com
#create new Azure App for BC, assuming 8080 port is used to run WebClient, it can be changed. Display name also can be changed
New-AzureADApplication -DisplayName "Microsoft Business Central for $BCServerInstance" -HomePage "https://$($fullAddress):8080/" -ReplyUrls "https://$($fullAddress):8080" #in this part, Azure AD app will be created
#get Azure AD app properties
$BCAppObject = Get-AzureADApplication | where{ $_.displayname -eq 'Microsoft Business Central for $BCServerInstance' }
After running these scripts, you will be able to see the Azure app within Azure portal as shown in image 1 "Azure app registration list" in the post below. Next, we need to set permissions for users so they can access the new app.
#Set permissions so Azure AD users could access Business Central App
$req1 = New-Object -TypeName "Microsoft.Open.AzureAD.Model.RequiredResourceAccess"
$acc1 = New-Object -TypeName "Microsoft.Open.AzureAD.Model.ResourceAccess" -ArgumentList "9769c687-087d-48ac-9cb3-c37dde652038","Scope"
$acc2 = New-Object -TypeName "Microsoft.Open.AzureAD.Model.ResourceAccess" -ArgumentList "e1fe6dd8-ba31-4d61-89e7-88639da4683d","Scope"
$acc3 = New-Object -TypeName "Microsoft.Open.AzureAD.Model.ResourceAccess" -ArgumentList "6a71a747-280f-4670-9ca0-a9cbf882b274","Scope"
$acc4 = New-Object -TypeName "Microsoft.Open.AzureAD.Model.ResourceAccess" -ArgumentList "5fa075e9-b951-4165-947b-c63396ff0a37","Scope"
$acc5 = New-Object -TypeName "Microsoft.Open.AzureAD.Model.ResourceAccess" -ArgumentList "21f0d9c0-9f13-48b3-94e0-b6b231c7d320","Scope"
$req1.ResourceAccess = $acc1,$acc2,$acc3,$acc4,$acc5
$req1.ResourceAppId = "00000003-0000-0000-c000-000000000000"
$req2 = New-Object -TypeName "Microsoft.Open.AzureAD.Model.RequiredResourceAccess"
$acc6 = New-Object -TypeName "Microsoft.Open.AzureAD.Model.ResourceAccess" -ArgumentList "4ae1bf56-f562-4747-b7bc-2fa0874ed46f","Scope"
$req2.ResourceAccess = $acc6
$req2.ResourceAppId = "00000009-0000-0000-c000-000000000000"
$req3 = New-Object -TypeName "Microsoft.Open.AzureAD.Model.RequiredResourceAccess"
$acc7 = New-Object -TypeName "Microsoft.Open.AzureAD.Model.ResourceAccess" -ArgumentList "0cea5a30-f6f8-42b5-87a0-84cc26822e02","Scope"
$acc8 = New-Object -TypeName "Microsoft.Open.AzureAD.Model.ResourceAccess" -ArgumentList "2cfdc887-d7b4-4798-9b33-3d98d6b95dd2","Scope"
$acc9 = New-Object -TypeName "Microsoft.Open.AzureAD.Model.ResourceAccess" -ArgumentList "640ddd16-e5b7-4d71-9690-3f4022699ee7","Scope"
$req3.ResourceAccess = $acc7,$acc8,$acc9
$req3.ResourceAppId = "00000003-0000-0ff1-ce00-000000000000"
$req = $req1, $req2, $req3
Set-AzureADApplication -ObjectId $BCAppObject.ObjectId -RequiredResourceAccess $req
We have finished with Azure AD configurations. Afterwards, we will move to Business Central configuration. We will change a few parameters in Business Central instance configuration file using PowerShell and restart the instance.
#Changing required values in NST configuration to enable Office 365 authentication
#Change Credential type to NavUserPassword
Set-NavServerConfiguration $BCServerInstance -KeyName ClientServicesCredentialType -KeyValue "NavUserPassword"
#Set Azure AD BC app ID URI
Set-NavServerConfiguration $BCServerInstance -KeyName AppIdUri -KeyValue "http://$fullAddress"
Set-NavServerConfiguration $BCServerInstance -KeyName ClientServicesFederationMetadataLocation -KeyValue "https://login.windows.net/$Office365TenantName/federationmetadata/2007-06/federationmetadata.xml"
#Set correct reply URL
Set-NavServerConfiguration $BCServerInstance -KeyName WSFederationLoginEndpoint -KeyValue "https://login.windows.net/$Office365TenantName/wsfed?wa=wsignin1.0%26wtrealm=http://$fullAddress/%26"
Set-NavServerConfiguration $BCServerInstance -KeyName ValidAudiences -KeyValue "http://dynamicsnavwinclient/"
#restart NST instance to complete the changes
Set-NAVServerInstance -ServerInstance $BCServerInstance -Restart -Force
The last part of this script changes the Web Client configuration. This is also valid for Universal Business Central Client used by phones or tablets.
#change Web Server config to enable Office 365 authentication using Web Client
Set-NAVWebServerInstanceConfiguration -KeyName ClientServicesCredentialType -KeyValue "AccessControlService"
Set-NAVWebServerInstanceConfiguration -KeyName ACSUri -KeyValue "https://login.windows.net/common/wsfed?wa=wsignin1.0%26wtrealm=http://$fullAddress/%26wreply=https://{HOSTNAME}:8080/"
We have finished with PowerShell, now let’s review the result.
In order to see whether the Office 365 Azure app has been configured correctly, you need to open the Office 365 Azure AD admin panel and then Azure app registrations.
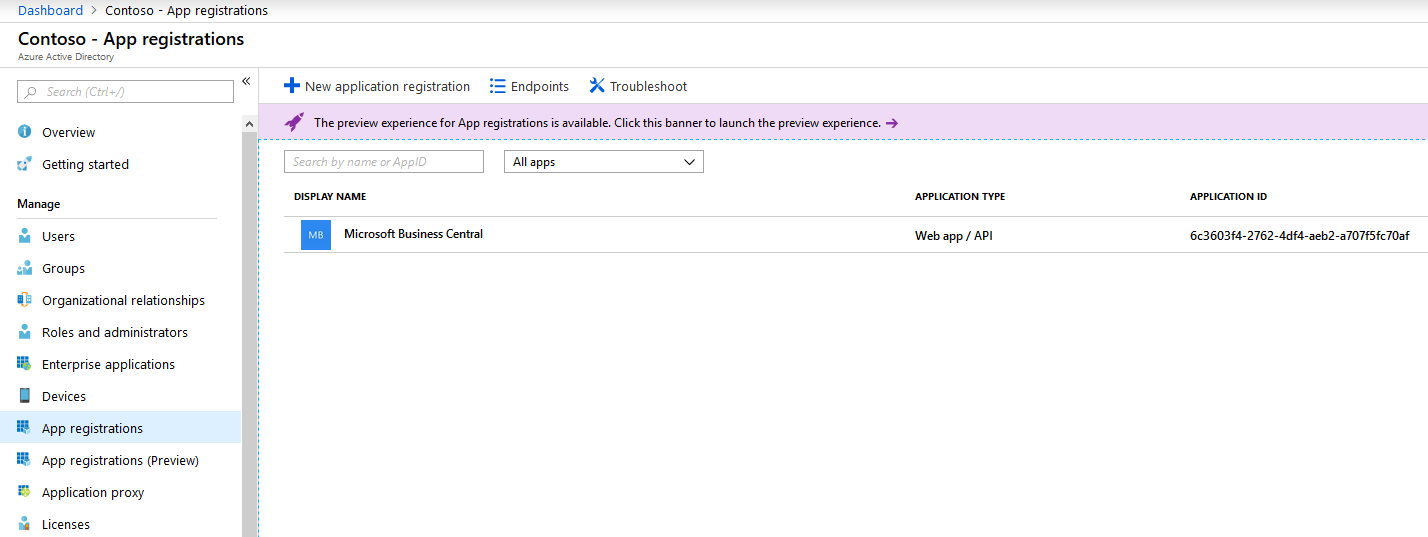
Image 1. Azure app registration list
Then try to connect with Business Central Web Client using Office 365 credentials.
The first time you log in, you will need to confirm additional rights. We recommend for the user with Azure AD administrator rights to perform this action. This way you will be able to grant access for all of the users by marking ”consent on behalf of your organization“.
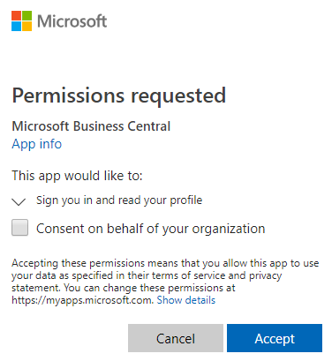
Image 2. Welcome to Business Central Web Client
About 1ClickFactory Self-Provisioning for NAV/Business Central on Azure
With 1ClickFactory Self-Provisioning for NAV/Business Central on Azure service Microsoft Dynamics Partners can easily deploy Dynamics NAV/Business Central solutions on Microsoft Azure through our platform in 1 hour or less. It’s self-service and available 24/7 on a highly secure and readily supported environment.
Click here to find out more about the 1ClickFactory Self-Provisioning for NAV/Business Central on Azure service or contact us at service@1clickfactory.com.